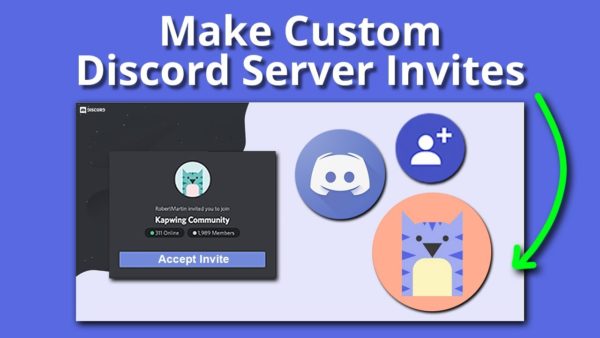
How To Customize Discord Server – Discord has gone a long way from its original purpose of being only for the gaming community in 2023 It is now a well-liked video calling and chatting tool for many types of individuals! Its popularity is due to the fact that it is entirely free and is largely used for group chatting.
How To Customize Discord Server?
Unexpectedly, KPOP fans use Discord as one of the fastest-growing groups outside of the gaming community, where they can exchange videos, songs, and more! However, it serves almost any community you can imagine! Simply download the app and set up a Discord server if you want to give your team members or friends access to a private area. In essence, it’s so basic and straightforward that anybody can do it!
Table Of Contents
How to create a Discord server?
How to customize Discord server!
1. Add some user roles for easier management
2. Try adding some colorful gradients
3. Incorporate some channels with your interests!
4. Customize your Channel Name!
5. Add some Discord Bots
6. Create your bots
Conclusion
Table Of Contents hide
1 How to create a Discord server?
2 How to customize Discord server!
2.1 1. Add some user roles for easier management
2.2 2. Try adding some colorful gradients
2.3 3. Incorporate some channels with your interests!
2.4 4. Customize your Channel Name!
2.5 5. Add some Discord Bots
2.6 6. Create your bots
3 Conclusion
How to create a Discord server?
After creating the server, you may invite your friends and establish new channels based on the content it offers! In addition to yourself, you may designate others as moderators on your server! Since we now know how simple it is to setup our server, today’s tutorial will focus on customising a Discord server.
We know what we need to do to get here now that we have a better understanding of how the server is built.
You may find out how to tweak the Discord server if you want to give it a bit more punch! We’ll investigate it specifically next!
You may quickly develop a distinctive selling or enticing point for your channels and platform by customising your Discord server.
If your server is made to be appealing and engaging, then more players will want to participate if you want to build a thriving gaming community!
How to customize Discord server!
1. Add some user roles for easier management
A user role assignment is the first thing you should do to personalise your Discord server. This basically suggests that once configured, only certain people are granted authorization to carry out actions! Of course, because everyone has a set of responsibilities to fulfil, it makes everything more efficient and smooth.
Therefore, if you have a user who qualifies as a moderator, you may give them the responsibility of removing or prohibiting specific kinds of comments that you deem inappropriate. The moderator will be able to handle this without you, which is the greatest part! To make it simpler for everyone to understand who is in charge of what, you can also give these responsibilities some colour when you assign them.
If you wish to control how each user’s responsibilities are assigned, you can:
1. To access roles, first right-click the server icon, then choose Server Settings.
2. Then, click on “Create role” button.
3. Now, enter the role name, select colour and complete the other details and you’re done.
There are several permits available. Roles help your server become more organised and may also communicate to new users that your server has been configured.
Gradients are another option if adding simple colour isn’t enough to make your Discord server stand out from the crowd. What you must do is as follows!
2. Try adding some colorful gradients
Injecting some much-needed colour into your Discord server is the finest way to personalise it.
However, we’re not just talking about any hue; on Discord, we’re talking about gradients! Since they can both refresh your experience and be utilised to establish your own server identity, gradients have swiftly emerged as the newest and trendiest trend on servers.
A gradient may be easily added to your server. You may choose to go all out and add one to the whole website, or you can go for a more understated impact by adding one to the server’s main symbol. Everything depends on what you desire as a user! It is
Creating backdrops with internet generators is also pretty straightforward. Discover one, download it, then just export the coding to your website!
We most definitely aren’t asking you to stop right there when we refer to gradients! You may develop it whatever far your creativity will allow! To further personalise your Discord server, add rainbow hues, pastels, electric tones, and pretty much anything else you can think of!
3. Incorporate some channels with your interests!
The channels are what bring people in rather than just having a server! Nobody has a narrow focus of interest. You may primarily enjoy gaming while also include your favourite songs there! That is the purpose of channels! Your users may very easily utilise this as a forum to talk about and exchange new works of art, music, literature, movies, and pretty much anything else! It’s the ideal approach to mingle and develop deep connections with others.
4. Customize your Channel Name!
Any visitor to your server will notice your channel name as soon as they arrive.
As a result, it’s crucial to decide on the name and, more crucially, the design! Well-considered channel names are appealing to many people, particularly those that include charming kaomoji or emoticons.
Additionally, by doing this, you may inform your audience that this is the focus of your channel.
You are not restricted in any way; you are free to use whatever font style you come across. To create a unique design, search for a few well-known font generators online and quickly choose and add them.
5. Add some Discord Bots
Adding some bots to the Discord server is the last method to personalise it. Discord bots are not only very useful, but they may also liven up your server and add some flare! Using them for task automation is, of course, the most apparent use.
Therefore, you may assign them to a bot if you want to make sure that the rules of your server are followed or if you want to make sure that each user who visits your server receives a sweet little welcome message! Of course, bots are capable of much more than this; in fact, you can give them hundreds of jobs and strategies to take care of your server so you don’t have to!
This may include removing spam and verifying that your area functions properly. In the end, they resemble the little robot butlers who save you time, particularly when you are unable to control your server yourself! You’ll need to search for one if you want to add a bot to your Discord experience.
Fortunately, there are a tonne of alternatives available that you can access via different websites online! One of the most popular websites that visitors visit is Discord. The greatest aspect is that because the websites list them in order of popularity or creation, you can accurately determine what bot is hot.
It just takes a few clicks to access and invite a bot to your server after you’ve found one you like.
You may easily provide the bot access to certain tasks for this by just logging into your Discord server.
When you give them this assignment, they can carry it out! Everything about the procedure is so simple and available. The nicest aspect is that your bots will appear in the Server Members settings list.
6. Create your bots
You must be asking where the custom portion fits in at this point. Well, even installing a bot and giving it tasks to do counts as personalising your experience.
But if you’re a true aficionado, you can even design your own bots! These must be made using graphics programmes outside of Discord and connected to your server using the Development Portal for Discord.
We advise utilising any programming tool, such as Node, to construct your bot. Return to the Development Portal after it has been established.
After that, choose the Create Application option under the Applications menu. Select the option for Bot after creating a new application and giving it a name.
You will get a unique token as a result of this. Then, you may copy it and post it on Discord for confirmation. That’s all, then! Your custom bot is prepared for usage on your server!
Conclusion
The instructions on how to customise the Discord server so that you may have a fun, unique experience is now complete. Discord is, after all, a well-liked medium for many individuals to interact and express themselves. And now that you have this wise manual, you know just what to do!
Related Tags: How To Customize Discord Server